Photography
How to copy and paste brush settings | Lightroom CC 2019
With the release of Adobe’s new Lightroom CC, it’s become quite frustrating trying to navigate your way through all the new

With the release of Adobe’s new Lightroom CC, it’s become quite frustrating trying to navigate your way through all the new changes.
Old settings you’d grown used to now either seem to be gone or buried deep in the system and are almost impossible to find. One of my favorites was the ability to copy and paste brush settings in Lightroom from picture to picture.
You know what I’m talking about, right? In the old desktop version of Adobe Lightroom, it seemed almost automatic. It came in super handy when you were going through a ton of photos in bulk, and it was just a simple copy, paste.
But now in this new version of Lightroom CC the copy function seems way less powerful… and way more frustrating! It won’t even copy your brush, radial, or gradient filters, and it won’t transfer the brush settings from photo to photo.
The truth?
The copy setting is actually more powerful now than ever before! Keep reading to find out how to make the most of the copy tool in Lightroom CC.
The real secret involves understanding how the copy function works. No, I’m not talking about how to click Ctrl/Cmd + C and then clicking Ctrl/Cmd + V.
For now, let’s imagine those hotkeys didn’t exist. If you were trying to figure out how to copy and paste your settings, how would you do it?
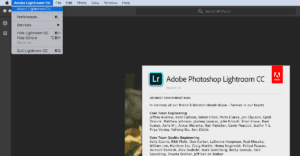
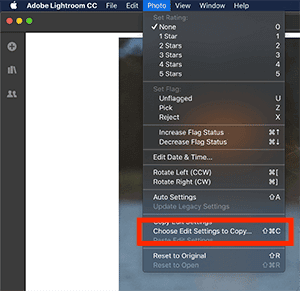
Well, like the technically savvy person you are, you’d probably go to your toolbar and browse through the settings. If you did this correctly, under the Photo tab, you’d probably find the setting “Copy Edit Settings” which is also the command the shortcut Ctrl/Cmd + C refers to.

To copy and paste your brush settings in Adobe Lightroom CC:
If you click enter or the blue copy button you will only save that setting once. You’ll need to set this as your default if you’d like to paste a radial, gradient, or adjustment brush setting in bulk over many pictures.
To do this, in that same menu – Make sure the “Tools” box is selected.

Then, click the three dots in the top right corner of that small box. You should see an option to “Set as default“. If the option is greyed out, there was nothing different for Adobe Lightroom to change or save, meaning it was probably already saved.
Find out what else you might be missing out on with the new Lightroom CC. Or check out my tutorial on converting an XMP template back into an lrtemplate for older versions of Lightroom.
Interested in traveling more? See how I save money using Google to search for flights. Or read how I scored the coveted Southwest Companion Pass at a mere 20 years old.

With the release of Adobe’s new Lightroom CC, it’s become quite frustrating trying to navigate your way through all the new

How do you find tickets for cheap last minute flights? It would probably surprise you how often I hear the
Is it possible to convert an XMP file back to a lrtemplate? The short answer is – Yes! It is
